|
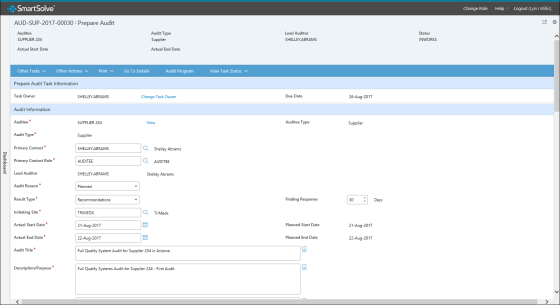
Prepare Audit Task Information
|
Displays the Task Owner and the Due Date. Click the Change Task Owner link to assign this task to another user.
|
|
Audit Information
|
Enter the information in the following fields. Some of this information defaults from the associated audit program.
- Auditee* - Zoom to select an auditee. If the auditee selected is a supplier, there will be an Auditee Detail link to allow the user to view the supplier information. For more information on configuration, see Auditees.
- Auditee Type - This field defaults from the selected auditee.
- Audit Type* - Click the drop down button and select the type of audit, such as Regulatory or Supplier. For more information on configuration, see Audit Types.
- Audit Sub-Type - Click the drop down button and select the sub-type of audit, such as Clinical Trial Default. This field is used to further clarify the type of audit. For more information on configuration, see Sub Types.
- Trial - Enter or zoom to select the name of the clinical trial. This field is only displayed if the Audit Type is Clinical Trial. For more information on configuration, see Trials.
- Phase - Zoom to select the phase. This field is only displayed if the Audit Type is Clinical Trial. For more information on configuration, see Phases.
- Primary Contact* - Enter or zoom to select the client/actor associated with the auditee. For more information on configuration, see Users.
- Primary Contact Role - Zoom to select the primary contact's role.
- Lead Auditor - This field defaults to the lead auditor selected when the audit is initiated.
- Audit Reason* - Click the drop down button and select the reason for the audit, such as Planned or For Cause. For more information on configuration, see Audit Reasons.
- Audit Total Cost - Enter or use the up and down arrows to specify the cost of the audit.
- Result Type - Click the drop down button and select the type of result for the audit, such as PASS/FAIL. For more information on configuration, see Result Types.
- Finding Response - Click the up and down arrows to specify the number of days allowed before a finding must be responded to.
- Initiating Site* - Zoom to select a site. For more information on configuration, see Organization Units.
- Actual Start Date - Zoom to specify the date when the audit will actually start.
- Actual End Date - Zoom to specify the date when the audit will actually end.
- Audit Title* - Enter a unique name for the audit.
- Description/Purpose* - Enter a description of the audit.
- Scope - Define the scope of the audit.
|
|
Site
|
Click the Add Site link to add a site to the audit. Enter or zoom to select a site to add to the audit. For more information on configuration, see Organization Units.
|
|
Process
|
Click the Add Process link to add a process to the audit. Enter or zoom to select a process(operation) associated with the audit. Multiple processes can be selected. For more information on configuration, see Process Setup.
|
|
Product
|
Click the Add Product link to add a product to the audit. Enter or zoom to select a product associated with the audit. Multiple products can be selected. For more information on configuration, see Product Setup.
|
|
Criteria
|
Click the Add Criteria link to add a criteria to the section. Enter the information in the following Criteria section fields:
- Criteria Number - Enter or zoom to select the criteria number to add to the audit. The Criteria Title defaults from and displays once the Criteria Number is selected. For more information on configuration, see Criteria Setup.
- Section Number - Click the Add Section link to add sections from the criteria to the audit. Enter the information in the following fields:
- Section* - Enter or zoom to select the section of the criteria to add to the audit.
- Title - The title defaults from the selected Section.
- Assigned to User - Click the drop down button to select a specific lead auditor/auditor from the internal audit team to be assigned to the audit section. Only this user will be able to add responses to this section during the Perform Audit task.
NOTE: If an auditor is deleted from the internal audit team and a section is already assigned to that auditor, then an error will display when the Prepare Audit task is signed off. Once the Prepare Audit task is signed off and the audit is routed, the Perform Audit task is routed to the auditors on the internal audit team. Auditors on the internal audit team, that are not assigned to a specific section cannot edit sections assigned to specific auditors. Sections not assigned to any auditor can be edited by any auditor on the internal audit team.
|
| Document |
Click the Add Document link to attach a document to the audit. Enter the information in the Document section fields:
- Document Number* - Zoom to select a document from the Document Management system. If Document Management is not installed, then enter a reference number for an external document. Forms Designer can be used to configure this field to link to an external document system. See the Studio Designer Help System for additional information.
- Document Revision - Enter the referenced document's revision number.
- Title - Enter the title of the document.
|
| Policy |
Policies control the optional steps that can be performed in your audit workflow. An administrator can set these controls and restrict your users from selecting or changing these options. Enter the information in the following Policy section fields:
- Perform Finding Review - Select Yes if you want to require review of the audit findings. If No is selected, then findings review will be skipped for this record. If Yes is selected, then a Finding Review task will be created and assigned to the Finding Reviewer that is required in the Internal Audit Team section.
- Perform Finding Approval - Select Yes if you want to require approval of the audit findings. If No is selected, then approval will be skipped for this record. If Yes is selected, then an Finding Approval task will be created and assigned to the Finding Approver that is required in the Internal Audit Team section.
NOTE: If both Perform Finding Review and Perform Finding Approval are set to No, then the Response Due Date is calculated based on the Finding Review Date plus the Finding Response Time.
- Auditee as Finding Approver - Select Yes if you want the auditee to have a finding approver task assigned to an assignee from the auditee as well as to the assigned internal team finding approver. The primary contact will be the default auditee assignee.
- Auditee as Response Approver - Select Yes if you want the auditee to have a response approver task assigned to an assignee from the auditee as well as to the assigned internal team response approver. The primary contact will be the default auditee assignee.
- Use Pilgrim CAPA Management - Select Yes if your company uses our CAPA Management system. If Yes is selected and a CAPA must be created, then a task will be assigned and a CAPA will be automatically created in CAPA Managament. If No is selected and a CAPA must be created, then a task will be assigned to document information about a CAPA created in an external system.
- Calculate Audit Score based on - Specify how the audit score will be calculated. Options include:
- Findings - The audit score is calculated based on the findings when an audit is performed. The formula is 100 - Total Findings Score Deduction from all findings in the audit based on the weights defined in the audit note type of each finding. The score is 0 if it goes negative.
- Criteria Responses - The audit score is calculated based on the criteria responses when an audit is performed. The formula is the Total Obtained Score/Total Possible Score based on the weights defined in the audit response type. The result is then multiplied by 100 to get the score percentage.
NOTE: This policy defaults from the audit type.
- Go to Audit Completion after - Specify when the audit will go into the Audit Completion Phase. Options include:
- Perform Audit or Finding Review/Approval (if applicable) - If this option is selected, then the audit will not wait for any other actions to be completed and will proceed to Audit Closure.
- Finding Response Approval - If this option is selected, then once Response Approval is completed, then the audit will proceed to Audit Closure.
- Closure of all Responses - If this option is selected, then once Response Approval is completed and all responses have been closed, then the audit will proceed to Audit Closure.
- Closure of all Responses and CAPAs - If this option is selected, then once Response Approval is completed and all responses and CAPAs have been closed, then the audit will proceed to Audit Closure.
- Auto Close? - Specify whether to auto close the audit or not. Options include:
- Yes - When the step specified in the Go to Audit Completion After policy is complete and Assign Audit Result and Closure Summary/Perform Effectiveness Review has been entered from Assign Audit Result, then the Verify Audit Completion task is skipped and the audit is closed automatically.
- No - When the step specified in the Go to Audit Completion After policy is complete then the Verify Audit Completion task is always routed.
|
|
Internal Audit Team
|
Several different user roles are involved in the audit process. Customers must configure their own roles to be used with the system. The following tasks (roles) have been configured as defaults in the Audit Management application.
- Lead Auditor - A lead auditor must be selected. The lead auditor is responsible for perfor ming audits, documenting audit findings and/or observations, reviewing audits, and preparing audit reports.
- Auditor - The auditor is responsible for performing audits, documenting audit findings and/or observations, and preparing audit reports.
- Finding Review - Finding review is an optional task (if the Perform Finding Review policy is set to Yes) in the Audit record and is typically performed by the lead auditor. If the Perform Finding Review policy is enabled, then a reviewer must be selected. Only one finding reviewer can be defined.
- Finding Approval - Finding approval is an optional task (if the Perform Finding Approval policy is set to Yes) in the Audit record and is typically performed by the lead auditor and primary contact. If the Perform Finding Approval policy is enabled, then an approver must be selected.
- Findings Response Approval - Finding response approval is a required task in the Audit record.
- Completion Review - Completion review is a required task in the Audit record. Only one completion reviewer can be defined.
- Effectiveness Review - Effectiveness review is a required task in the Audit record. Only one effectiveness reviewer can be defined.
- Verify Implementation - Implementation verification is a required task in the Audit record. Only one verifier can be defined.
NOTE: If the role is defined as not required in Group Setup, then the Role and Task fields are editable. Delete the Auditor task if there will only be one auditor.
|
|
External Audit Team
|
Click the Add Team Member link to add an external team member to the section. Enter the information in the following External Audit Team section fields:
- Name* - Enter or zoom to select the external team member for the audit.
- Phone Number - Enter a phone number for the team member.
- E-mail - Enter an e-mail address for the team member.
|
|
Attachment
|
If necessary, click the Add Attachment + link and then browse to select files to attach. Click the OK button.
|